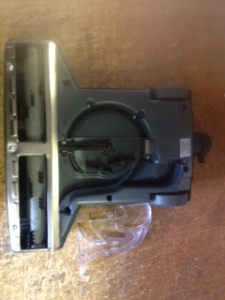
One of the most requested repairs we get questioned about is how to replace a vacuum belt. This is usually a bit different for each and every unit so it’s important to specify the individual directions for each. Today we will be taking apart the Vacuflo turbocat powernozzle, which is one of the most popular non-electric powernozzle’s on the market.
Step 1: After turning over the powernozzle you will notice that there is a clear plastic cover with plastic knobs that keep it in place. First you will want to turn these knobs so they are in position to release the clear plastic cover from the base assembly. Once the knobs are turned, the cover should come off rather easily.

Step 2: Once the clear plastic cover is gone, you can then move on to removing the three screws which hold the metal brush plate. Using a Philips screwdriver, turn the screws counter-clockwise until completely out. Once these are gone the metal plate will lift right off of the base assembly.

Step 3: Once the metal plate and clear plastic plate have been removed you will have to take off the final belt cover. This belt cover is a small grey plastic piece that is not secured down. Once this is removed you will have all the access to the belt and belt gears. Remove your old belt, but make sure to take not on the placement. You will have to realign the belt in the same way in order for it to correctly work.

Thanks for reading and happy cleaning!
The Central Vacuum Direct Team

